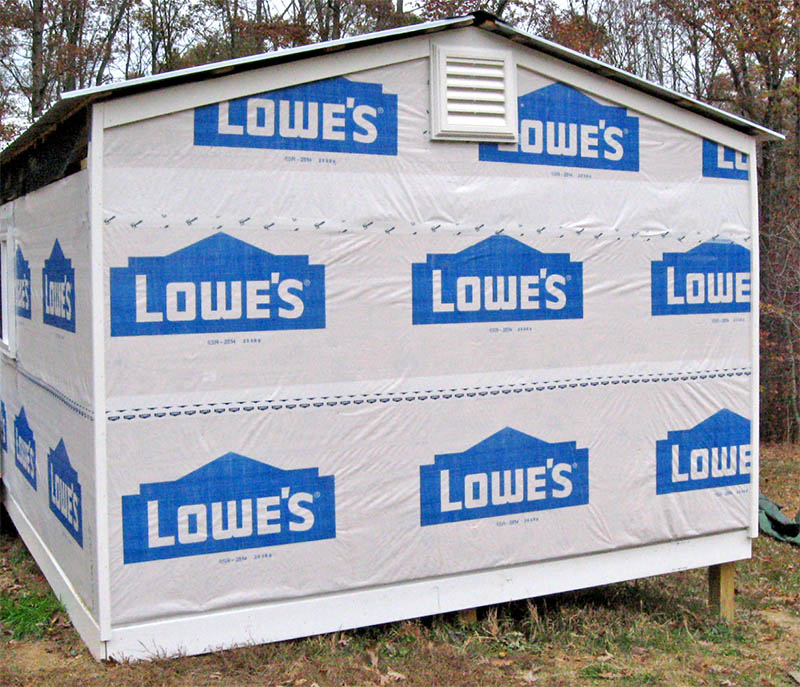
We will use Hardieplank lap siding on the exterior of the observatory, just like our house siding. It will be painted "Baritone Blues," a deep gray-blue color (RGB: 52 88 111).
Hardieplank is a concrete composite that must be cut with a diamond saw blade, and nailed with stainless steel nails. We hope we don't need to drill pilot holes for the nails.
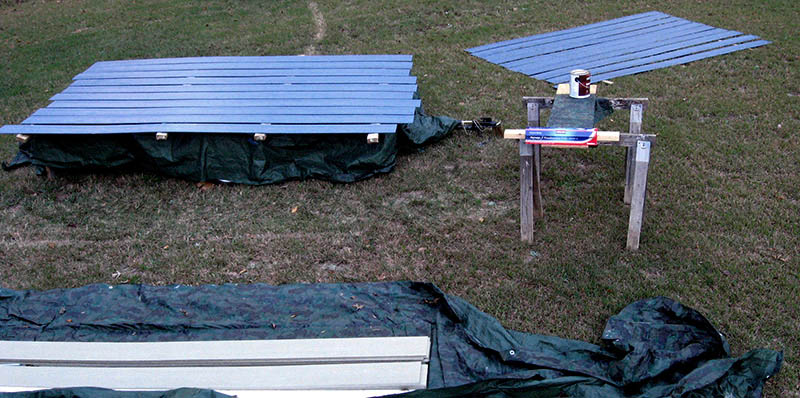
Louise painted 20 of the 40 12-foot lengths of Hardieplank lap siding today, and expects to paint the remainder tomorrow.
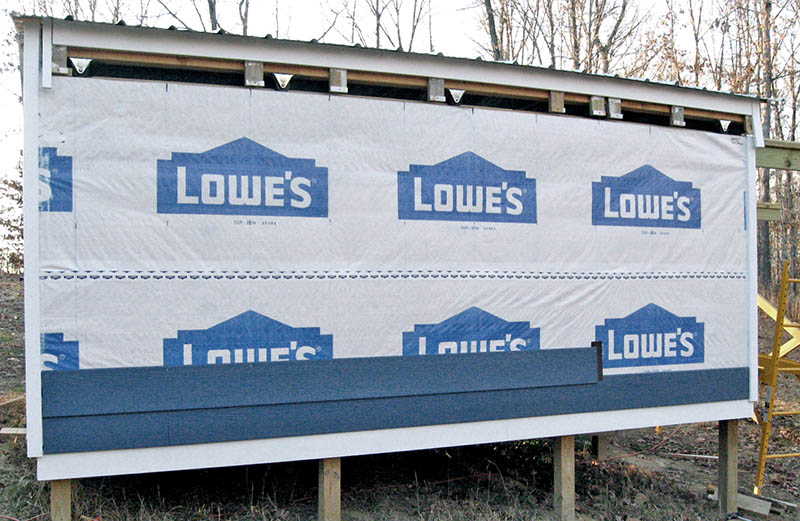
She moved each (heavy and flexible) piece from the pile on the ground to 2x4s spanning our utility trailer, then painted it with a roller. Here is today's work.
Louise painted 10 more lengths of Hardieplank lap siding. She'll paint the remaining 10 tomorrow.
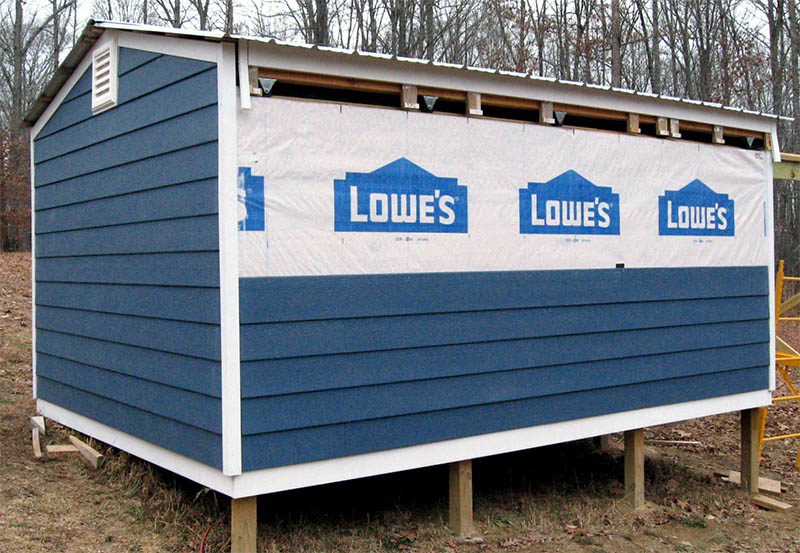
Louise painted the remaining 10 lengths of Hardieplank lap siding. Now we can attach house wrap (see the walls page) and begin installing trim and the siding. (We'll need eight more lengths of siding, but we'll wait a while before buying them.)
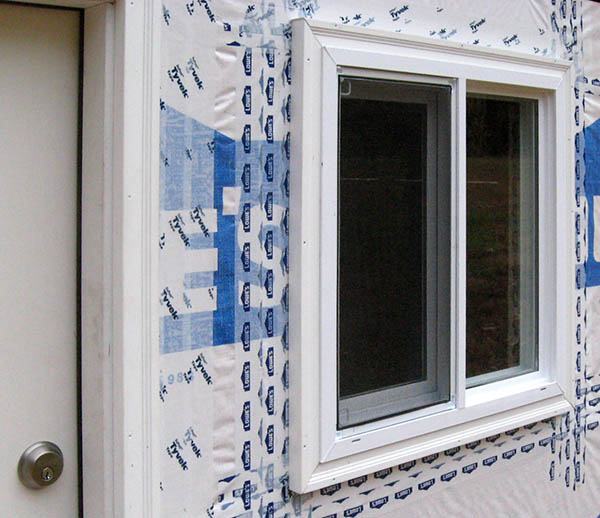
Mike cut and nailed brick molding around the west window.
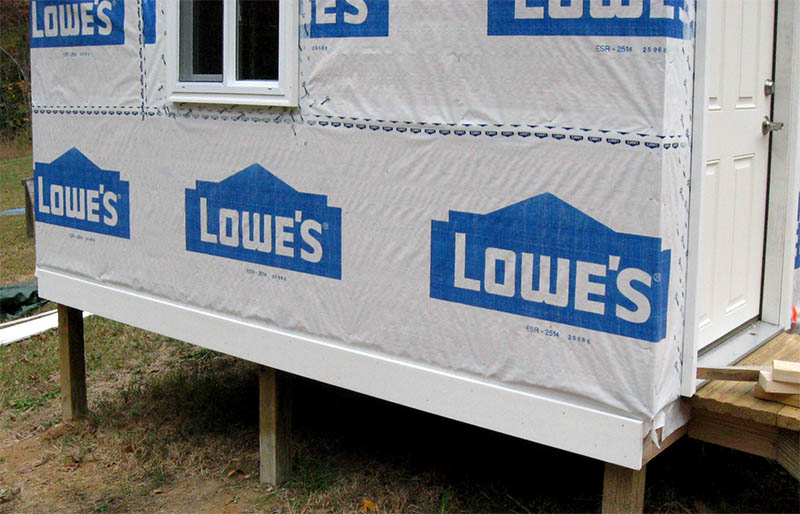
Mike cut and nailed brick molding around the north window, then nailed PVC trim over the north and south frame band boards. This photo shows the north band board, with the trimmed north window above it.
Mike cut and nailed PVC trim over the east and west frame band boards. The west trim was cut and notched to accommodate the steps, and the east trim needed a scarf joint to cover the full 14' band board.
Swarming ladybugs were a constant nuisance today – they landed and crawled on everything. Nevertheless, Mike managed to install the trim without killing them.
This photo shows the west and south band board trim.
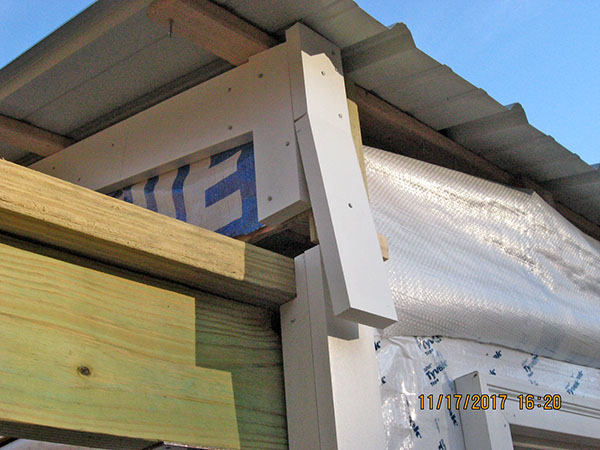
The roof needs 1" spacers along each side to hold its movable siding away from the stationary wall siding. Mike cut 14 9" 2x4 blocks, then used the band saw to slice them from 1½" thick to 1". He nailed the spacers vertically to the doubled 2x4 roof stringers. There is about ½" clearance from the spacer bottom to the roof track.
There were no ladybugs when Mike went out at 11:30, but they appeared an hour later, and were the same nuisance as yesterday.
We need one or two more spacers on each side, and the four end spacers must be notched to clear the roof trusses at those locations. Mike will do this work in the shop, and install these spacers when the rain ends.
It's been raining for the past six days, so we accomplished very little. Mike made the needed additional roof siding spacers. Today he made PVC trim frames for the two gable vents.
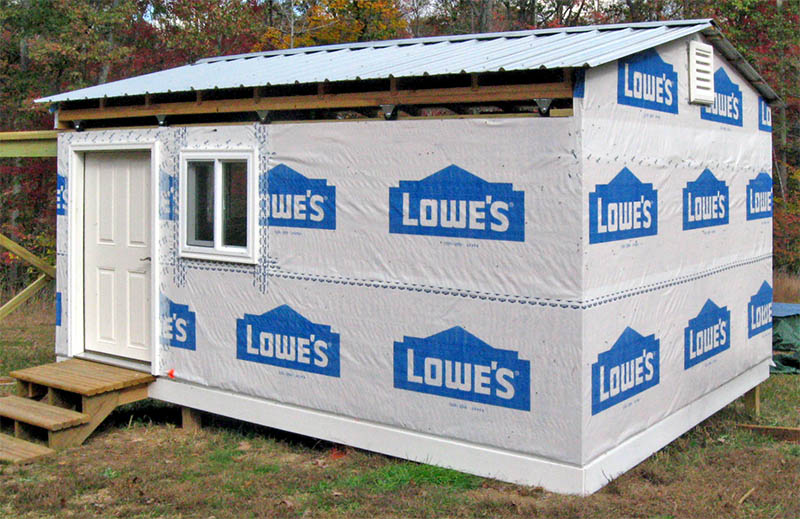
Everything is set to begin attaching the corner and gable trim, and we plan to do that tomorrow if it's dry enough.
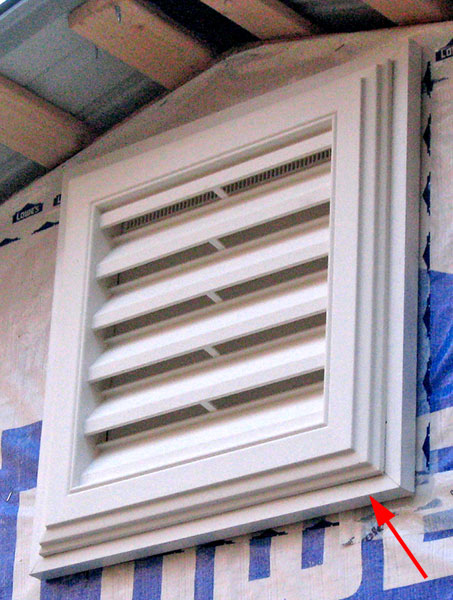
We must install the PVC trim in a specific order: Gable vents, gable peaks, corner end boards, corner side boards, and roof sides. The vent trim goes up before the gable peak trim because we might have to notch the peak trim to clear it.
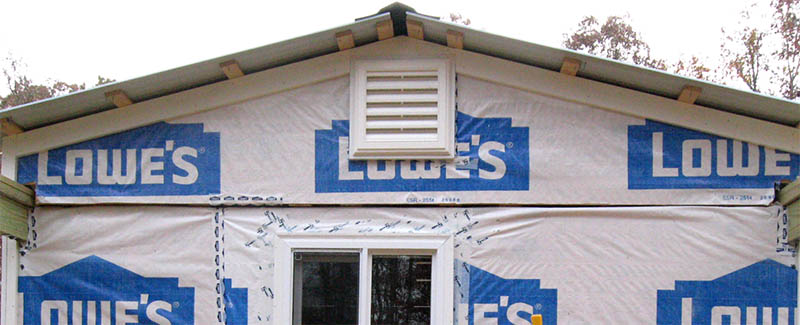
Today we attached the vent trim Mike fabricated in the shop. The trim fits under the vent's finish frame to provide a solid stop for the lap siding.
Working in mid-40° temperatures, we managed to install 1½" PVC trim on the two corners of the south wall. Then we fabricated and attached a single piece between the gable vent and the peak. Tomorrow we hope to install the 3½" trim along the top chords of the gable.
No photo today because there isn't much to see.
We finished installing the corner trim on the south end wall, and began working on the north wall trim. The south wall trim is stationary, and the roof closes over it, as seen here. But the north gable trim moves with the roof, so that work will be more involved.
Yesterday we finished attaching the corner trim on the north wall, and today Mike installed corner trim on the north end of the side walls. Trim is now complete on all walls except the north gable.
We took a close look at the trim needed along the east and west roof eaves, and decided to use 4½" boards instead of 3½". We'll need a trip to Lowe's to buy the needed boards, so we finished today's work by installing trim on the north gable.
Mike returned three 3½" PVC trim boards to Lowe's, and bought two 9¼"-wide 8' boards. He ripped these to 4½", then chamfered the ends to 45° and glued each pair of boards together to make two 16' boards for the roof eave trim.
Mike worked on the siding spacers on the east side of the roof, then fabricated and installed corner trim on three roof corners. This kinda-sorta matches the wall corner trim beneath it, but perfect alignment and appearance are impossible.
The upper 4½" is vertical to mate with the eave trim to be installed next. The lower 8" slants out to match the angle of the Hardieplank siding that will abut it. It looks a bit odd, but we hope it won't be very noticeable when complete.
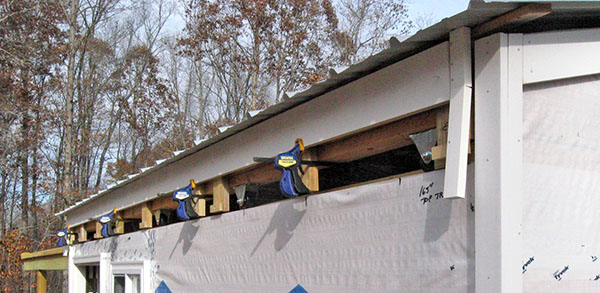
Not much happened over the weekend because Mike participated in a ham radio contest, but yesterday we installed the final spacer blocks for the roof eave trim. Today Mike installed the 14-foot PVC eave trim he glued together in the shop last week.
This turned out easier than anticipated. Each spacer block has a small piece of wood at the bottom to tilt-out the lower edge of the Hardieplank lap siding beneath the trim. These made handy "ledges" for this operation. Mike set the 14' trim on the ledges, then clamped it to the spacer blocks.
Once clamped, Mike incrementally moved the trim upward until it touched the underside of the steel roof. He loosened one clamp at a time, shifted the semi-flexible trim, and re-clamped it (photo below). When the trim was high enough, he nailed it in place. He did this on both sides of the roof, standing on the scaffold and rolling the roof to reach the entire length of the east side.
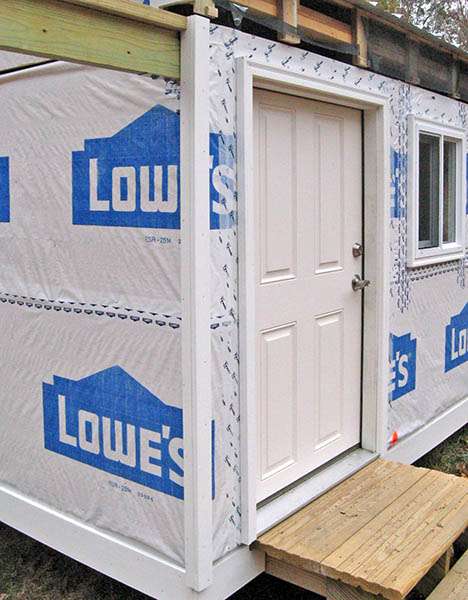
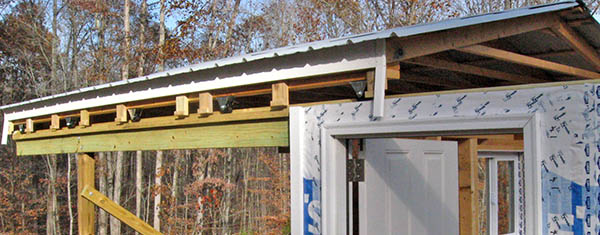
This photo below shows the west trim on the open roof. That vertical corner trim piece over the door just clears the molding, as intended.
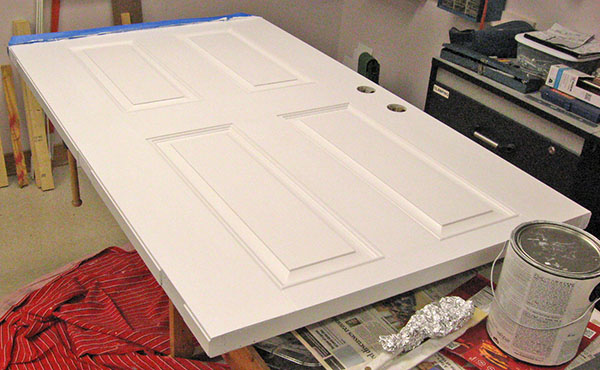
With all the trim in place, Louise painted it. Mike removed the door and carried it with the tractor to the shop for indoor painting.
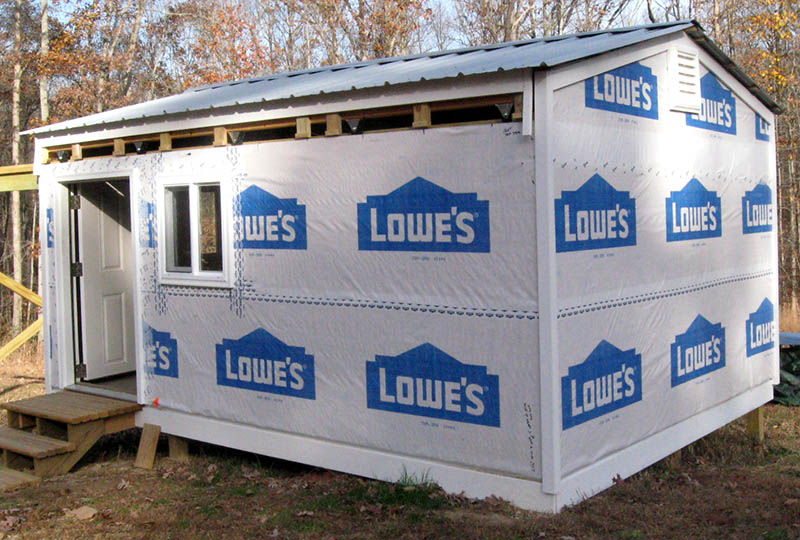
The trim is complete except for two small pieces we need to add beneath the door molding, and four pieces above the roof tracks on the north gable. We'll do the door trim right away, but the gable trim can wait until we're ready to install siding there. Next step: install the Hardieplank lap siding.
Mike removed the hinges and lockset, then Louise painted one side of the door. After an eight-hour wait, we flipped the door, and she painted the other side. We'll reinstall it on Friday, after Thanksgiving.
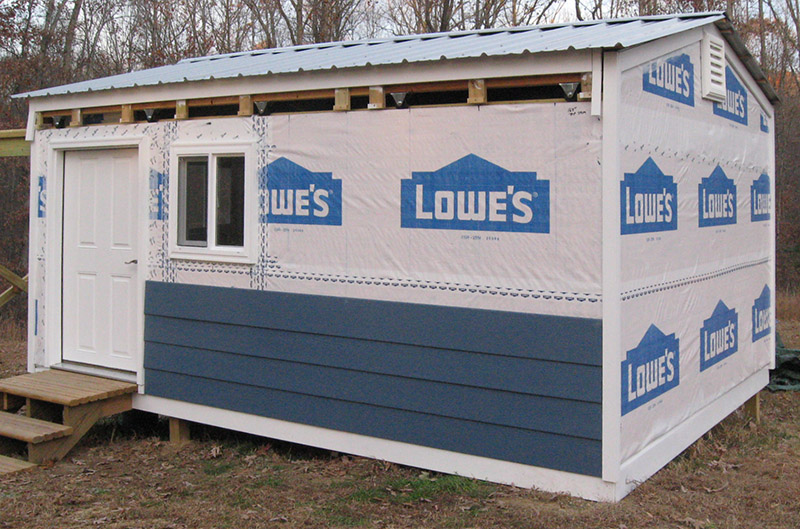
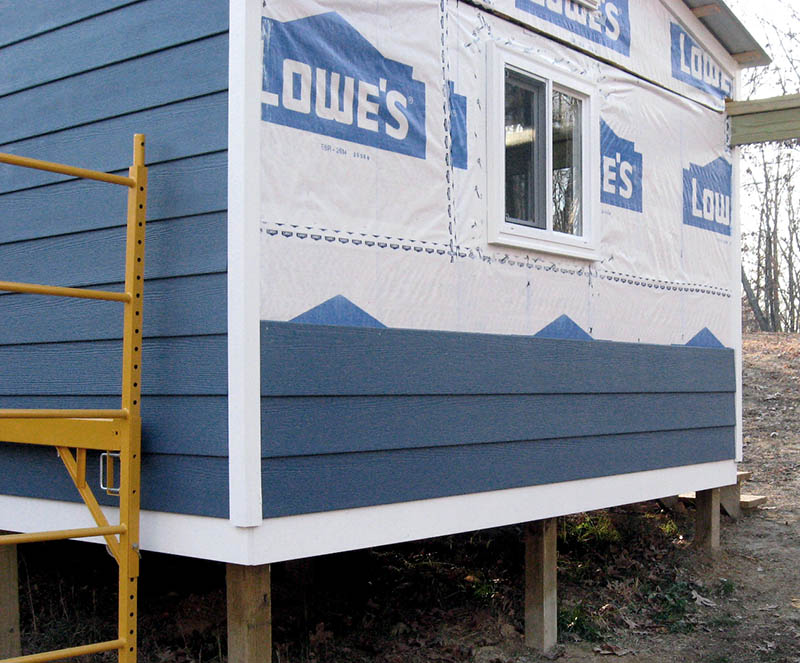
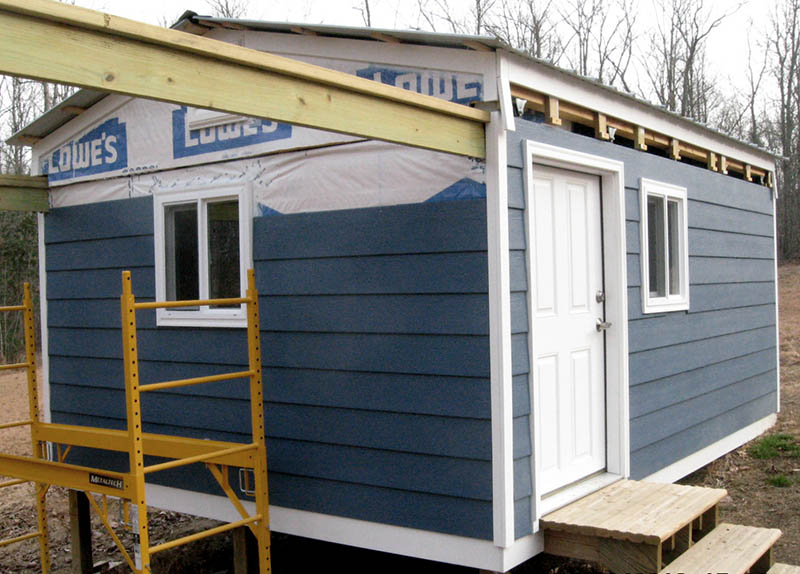
Yesterday Mike used the tractor to carry the newly painted door to the observatory, and we put it back on its hinges. Then we used a water level to mark the top of the first course of lap siding on all four walls.
Today we began installing the siding on the west wall.
After some trial-and-error, we established a work process that is straightforward and relatively fast. We installed four laps, and hope the work will go a bit faster tomorow.
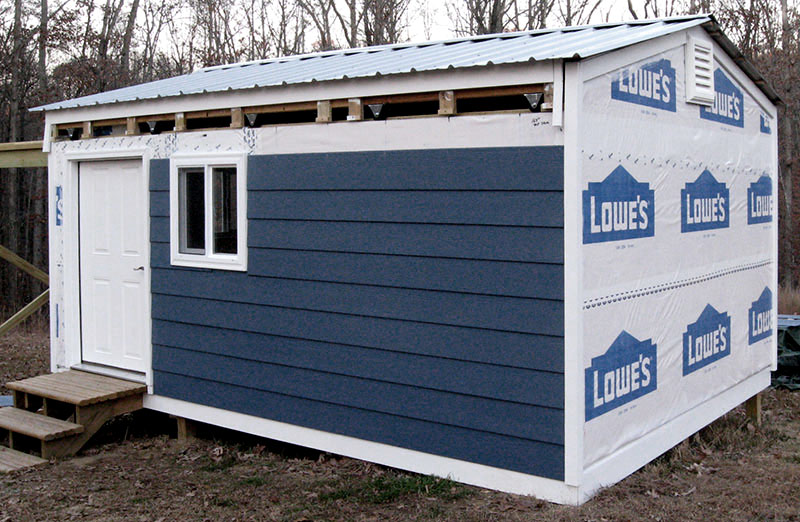
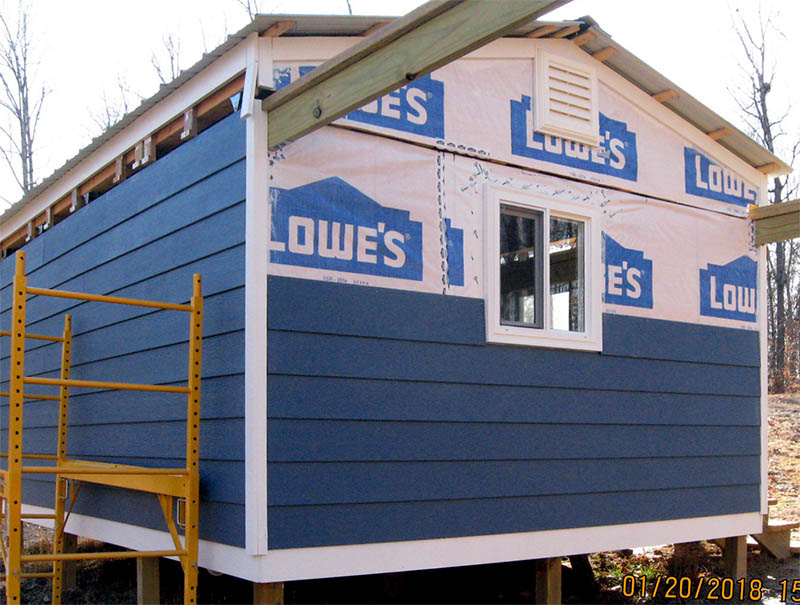
We spent about four hours installing siding on the west wall. Only one full board remains, plus one on the side of the roof. Today's work was complicated by cutting notches for the window. We still need to install a narrow strip beneath the south half of the window. Also pending are short boards to the left of the door.
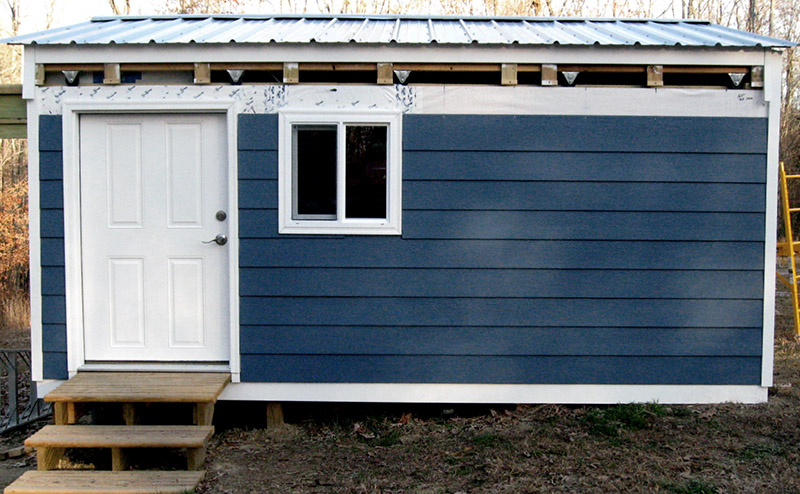
Today's plan was simple– install nine 6" pieces of lap siding to the left of the door. But it took us three hours to accomplish this simple task! Cutting the siding to the exact length proved difficult. Sometimes the piece was 1/8" too long, leaving a gap too narrow to hold caulk, and other times the piece was too short. We remade five of six pieces, and were thoroughly disgusted at the end of it all.
nevertheless, we prevailed. Despite the frustration, the observatory is looking pretty good. This is the west wall at the end of today's work.
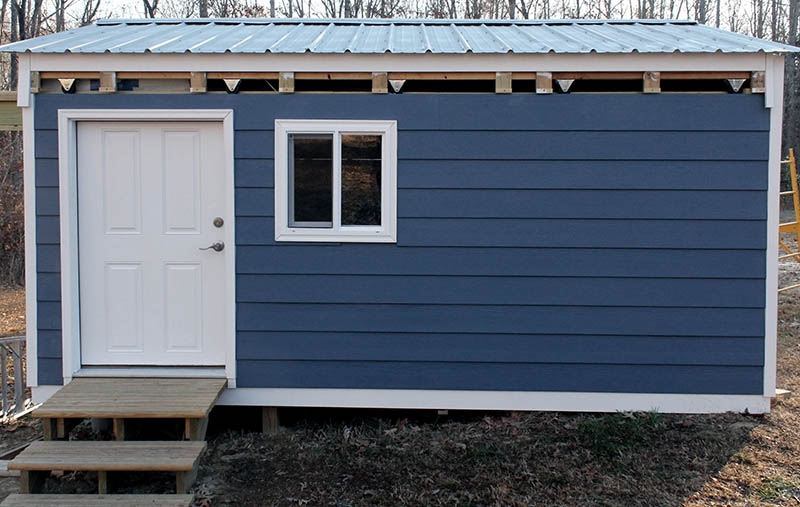
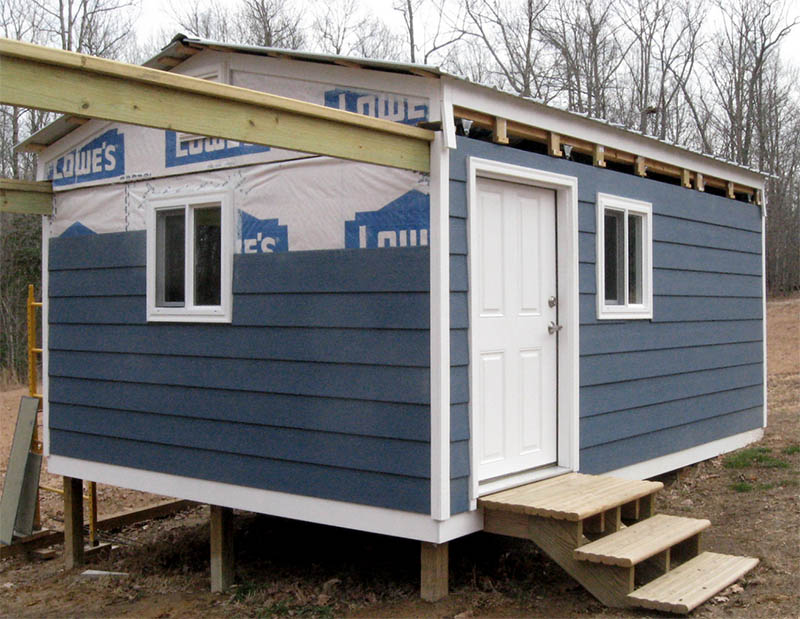
We got a late start today, so only managed to install the final siding lap on the west wall. This involved cutting notches for the door and window, and butting two boards togther for our first full-length lap.
Only one lap remains, and it will be attached below the white trim on the eave, to move with the roof. But we'll wait on this board because Louise needs to caulk around the door and window trim before the eave siding blocks access to those areas.
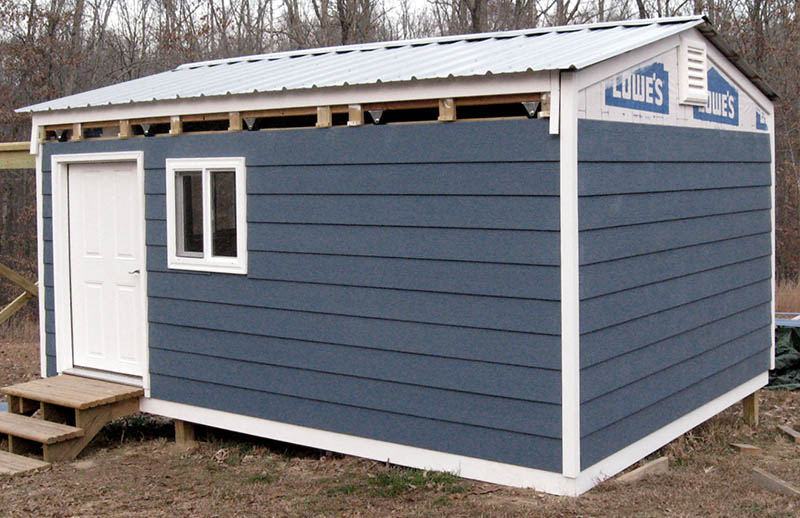
We made excellent progress today, nailing up nine 10' siding boards on the south wall. The work went well partly because all boards are nearly the same length, and also because there are no door or window cutouts. We'll do the 10th board tomorrow. It's starting to look good!
What a struggle! It took us nearly two hours to cut and nail up the 10th board on the south wall. We were hoping to start siding the south gable, but that was not to be. Saturday, maybe.... In any case, here's the observatory with 10 laps on the west and south walls.
We managed to cut and install two siding laps on the south gable – the full-width piece beneath the vent, and a half-width piece on each side of the vent. Measuring and cutting the 14° taper on the upper boards was a bit of a challenge, but we prevailed. One more lap and we can move on to the east side.

We thought we had it licked, but cutting and nailing up the last two short pieces of siding on the south gable turned out to be a big hassle. We finally got them right, so next time we can start siding the east side. That won't be for at least five days, given prior commitments and a rain forecast.
Here it is, five days later, and we're still stalled. It snowed last night and today – only 1½ inches, but sufficient to make the ground sloppy for another couple of days. Rats!
We lost 12 days, mostly due to weather, but today we were able to install nearly two laps of Hardieplank siding on the east wall. The siding is 12 feet long, and this 14-foot wall has no window or door, so each lap has a butt-joint somewhere along its length. We install flashing behind each joint to prevent water penetration (brown strip at the end of the lap).
Here is today's work.
Today we finished yesterday's partial siding lap, then added three more, for a total of five laps on the east side – half done.
With warmer temperatures and bright sunshine, we worked about five hours to nail up the remaining five siding laps on the east wall.

Today we installed the first three siding laps on the north wall.
Wow – we lost a solid month of work! The weather has been very cold, including some sub-zero nights. It finally warmed up today, and we managed to install three more siding laps on the north wall.
But this is the north wall, so the shaded ground here was either mud or had remaining snow waiting to melt and add to the mud. We tromped around in the mud, but we're not sure if we'll be able to set up the scaffold to attach the higher laps.
It was a struggle today, but we installed three more lengths of siding on the north wall, two east of the window, and a longer one on its west side. We also installed a narrow strip beneath the window. Maybe tomorrow we'll make better progress.
We set up the scaffold to install the high siding, but managed only one length on each side of the window. This time we had to notch one end of a lap to clear the east roof track.
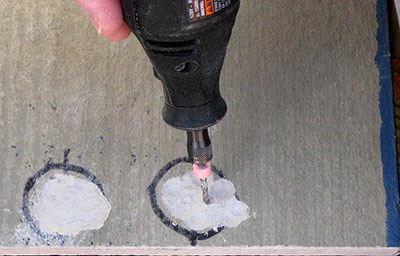
On the ends of today's lap, we had to hollow-out two "dishes" on the back to clear the bolts that attach the track to the wall. Mike marked the circles, then used a high-speed motor tool with a carbide bit to rout the full hollow, as seen here. This "minor" step consumed nearly an hour.
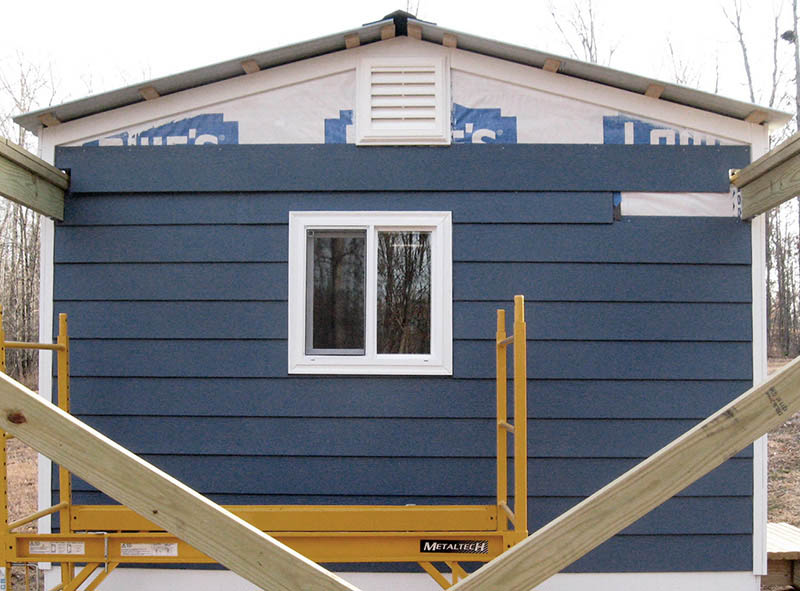
Today we installed the first siding lap on the north roof gable before finishing the north wall. The gable moves with the roof, and the siding hangs lower than the siding on the fixed wall, so having the first lap installed gives us a measuring reference for the higher laps. Then we can plan how to allocate our remaining boards without running short.
Mike cut notches in both ends of this first lap to clear the roof tracks, plus a shallow cutout in the top edge for the vent. The wall below it looks odd with the missing 1½ laps, but their turn will come soon.

We nailed up all the remaining north wall siding except one 3' length. The top lap had to be cut down from 8¼" to about 6" to be flush with the top of the wall. Also, we notched the ends to clear the roof tracks.
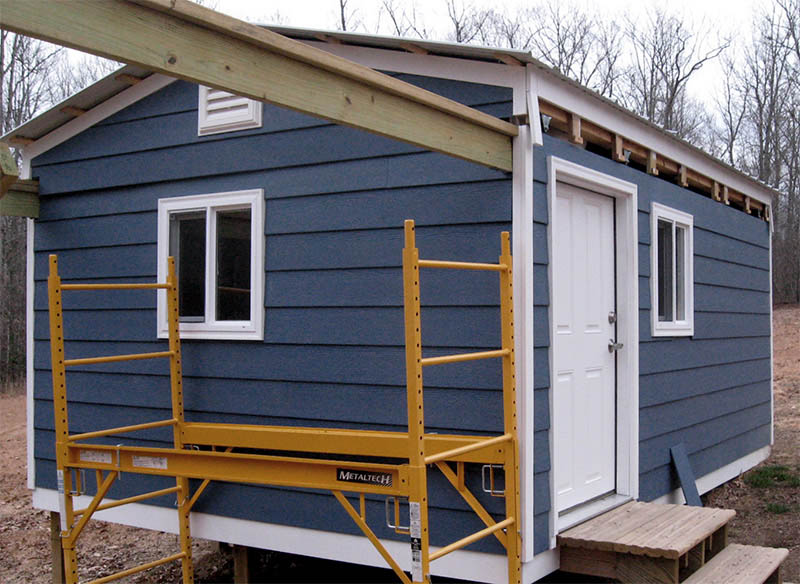
This photo shows the north end at the end of today's work. We're making progress!
It was a real struggle, but we finally finished the siding on the north wall and gable.
Every lap required special cutting – notching an end or tapering the lap to match the roof's 14° angle. But one piece really fought back – we had to re-make it three times! Eventually we got it right.
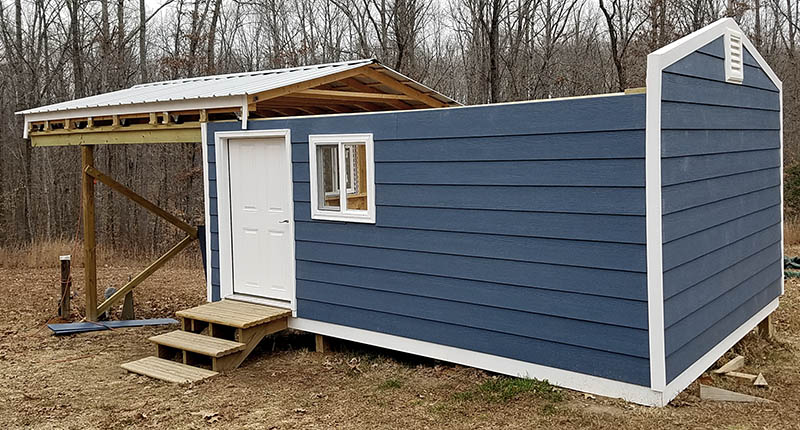
Here is the observatory with all siding installed except two 14' lengths on the eaves to cover the wheels and gaps between them.
We had planned to put this project "on-hold" until sustained warm and dry weather permited caulking. We had waited for over two weeks and, while some days were warm, they were followed by cold nights or rain.
But yesterday and today the temperature was in the mid-70s (in February!), so Louise decided to caulk everywhere siding meets trim. She did enough yesterday to allow us to install the siding laps under the eaves, covering the wheels.
With that done, Louise finished caulking, and we declared the structure complete (celebratory dinner tomorrow).

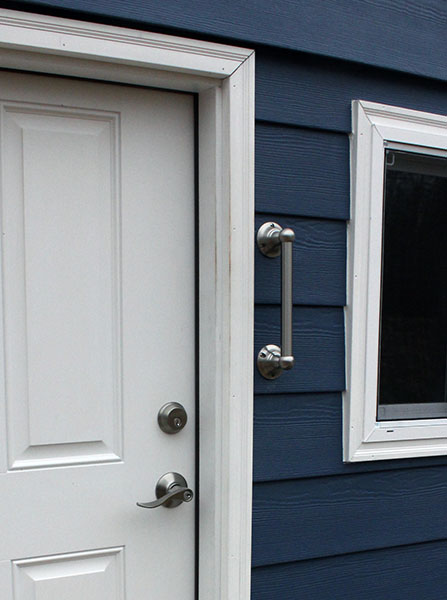
Mike installed a grab handle next to the door. The steps have no railing, so the handle helps while climbing the steps, opening the door, and ducking to clear the short doorway.
Next up – Mike will wire the observatory and install a garage door opener to roll the roof.
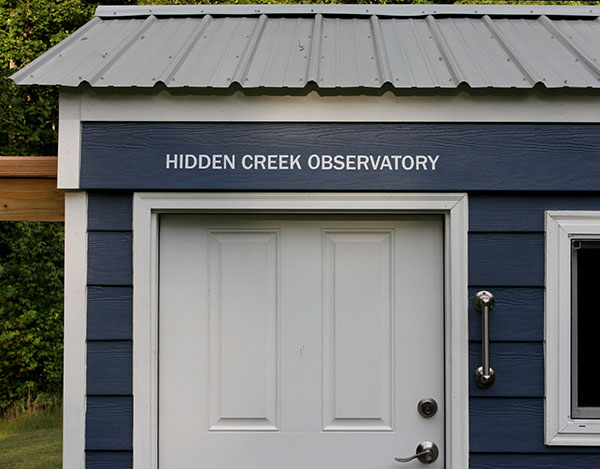
We named our new observatory Hidden Creek Observatory because it can't be seen from Creek Road, where we live. Mike used his craft cutting machine to cut the 2½" letters from thin vinyl backed with permanent adhesive. We hope the adhesive truly is "permanent" on this west-facing wall. Three years later the letters still are securely stuck, and show no signs of peeling off.
Melting snow from a December storm dripped from the roof and splashed onto the door threshold. After a sub-freezing night, the door was frozen shut!
Today Mike installed a 4½-foot length of plastic gutter to direct water away from the porch and door. It has no downspout – the water runs out and falls onto a bed of crushed stone by the northwest corner.

Updated May 23, 2023