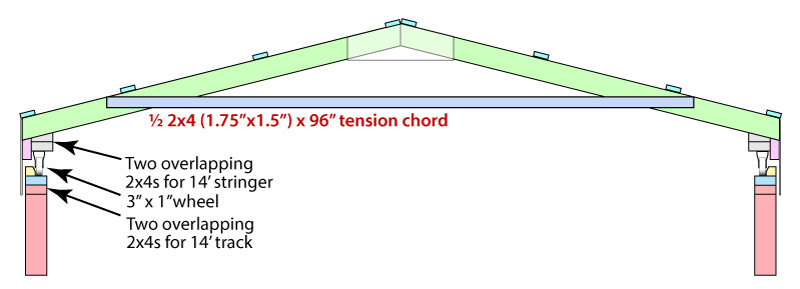
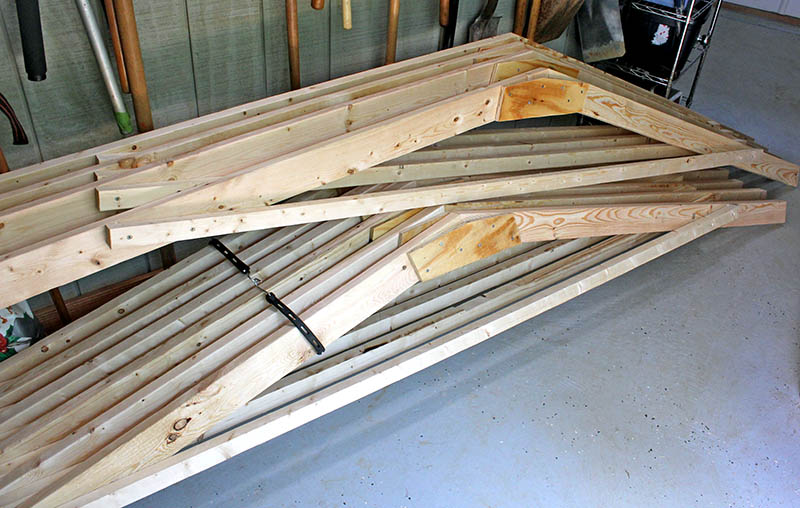
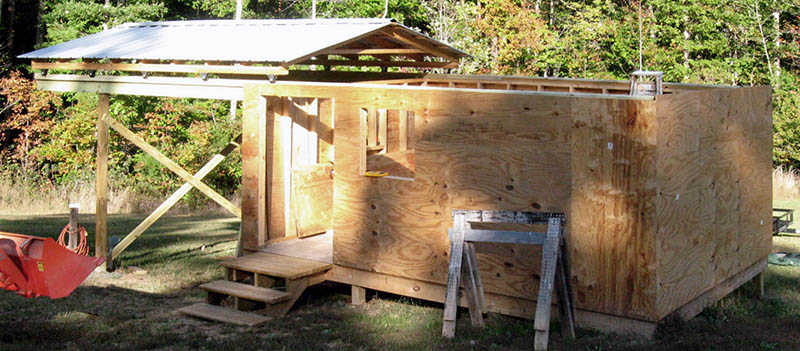
The roof will be constructed of 3:12-pitch gable trusses spaced about 20½" apart on doubled 14' 2x4 stringers. Ten 3" hard-rubber casters bolted to the bottom of the stringers will roll on 2x4 tracks attached to the top of the walls. The tracks will extend beyond the north wall, supported at their ends with 4x4 posts. We will use standing-seam steel roofing over the roof trusses.
This drawing shows the construction details of one gable truss.
Mike has been busy cutting 20 2x4s into 5½' chords for the 10 roof trusses we need to build. He set up a jig on the workbench consisting of two scrap 2x4s joined at the needed 14° angle. He also cut 10 plywood gussets to join two chords at the peak.
To make a truss, Mike clamps two chords against the jig, and also clamps them to the workbench to ensure they don't move. Then he applies glue to the gusset, and nails it in place. Later we will attach the 96" tension chord between the truss chords, as shown in the drawing above.
Mike finished the 10 roof trusses, then ripped five 2x4s in half for the 10 8' tension chords. He screwed and glued the tension chords to the truss chords, and stacked them in our yard equipment room.
The roof trusses will rest on two 14' stringers. Each stringer is made of two stacked 2x4s. The top 2x4 will have 14° slots cut into it for the trusses, and the bottom 2x4 will have five 3" wheels bolted to it.
Yesterday Mike laid out the two stringers, and marked where to cut the slots on the top 2x4. He also marked and drilled holes to attach the wheels on the bottom 2x4.
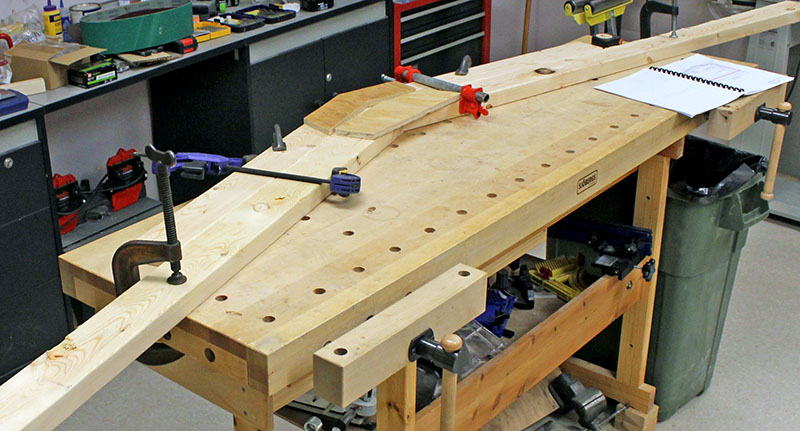
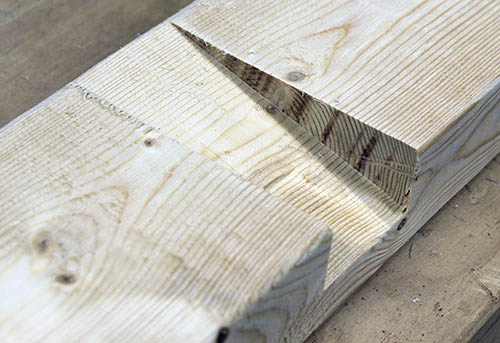
Today Mike began cutting the 14° slots for the roof trusses. These photos show how.
Mike used the same jig he used to cut similar slots for the tractor shed roof. The jig fits over a 2x4, and two bolts clamp it in place. A router with a ½" bit and a template bushing follows the rectangular cutout in the jig's sloped top plate.

This is the resulting slot.
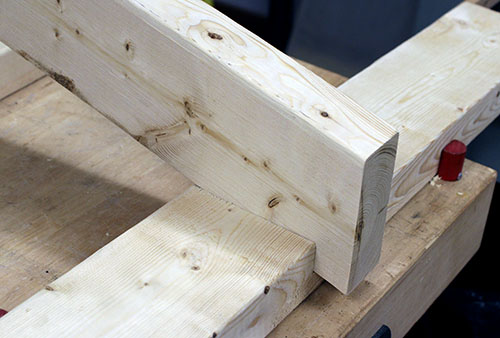
The 2x4 roof truss rests in the slot, and will be screwed in place.
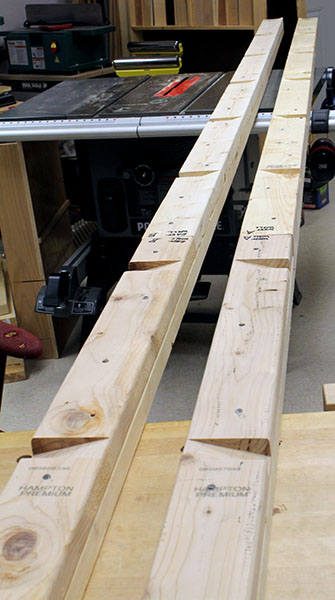
Mike finished routing the 14° slots in the 2x4 roof stringers. Then he nailed the top and bottom sections together, offsetting the 10' and 4' pieces so the joint in one section is backed by the 10' 2x4 in the other section.
Here are both 14' stringers with the slots in their top sections.
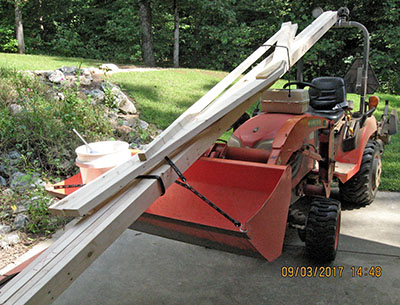
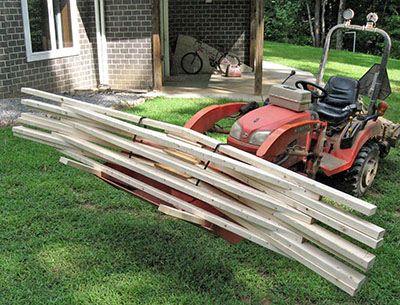
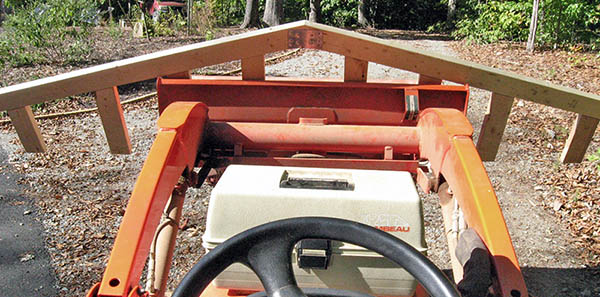
Mike loaded both 14' roof stringers and two roof trusses on the tractor, and transported them to the observatory. Then he returned to the shop for the remaining seven trusses.
|
|
|
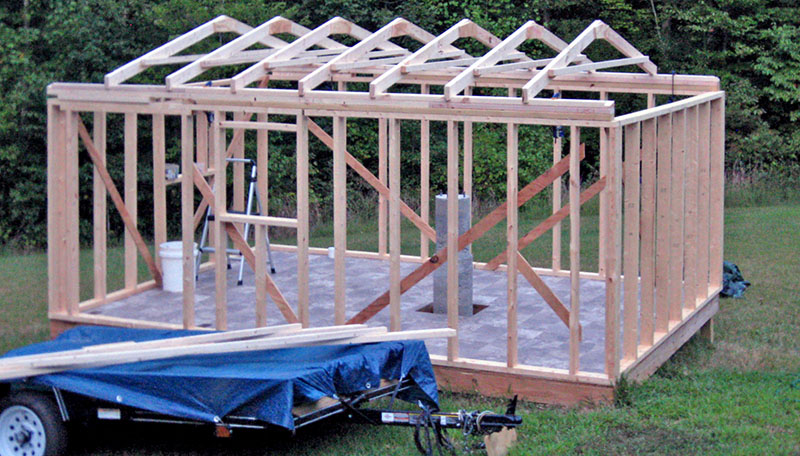
Later we installed seven of the nine roof trusses. Mike shimmed each end for a tight fit in the 14° slot, then drove a deck screw at 45° through the truss and into the stringer. He repeated this on the opposite side for a secure "X" attachment.
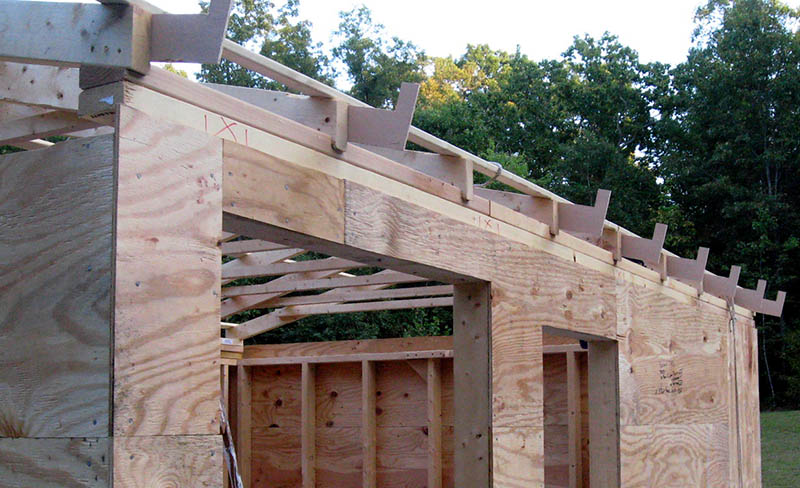
Here are the seven installed trusses. The two end trusses will require some extra work because their slots have only one side.
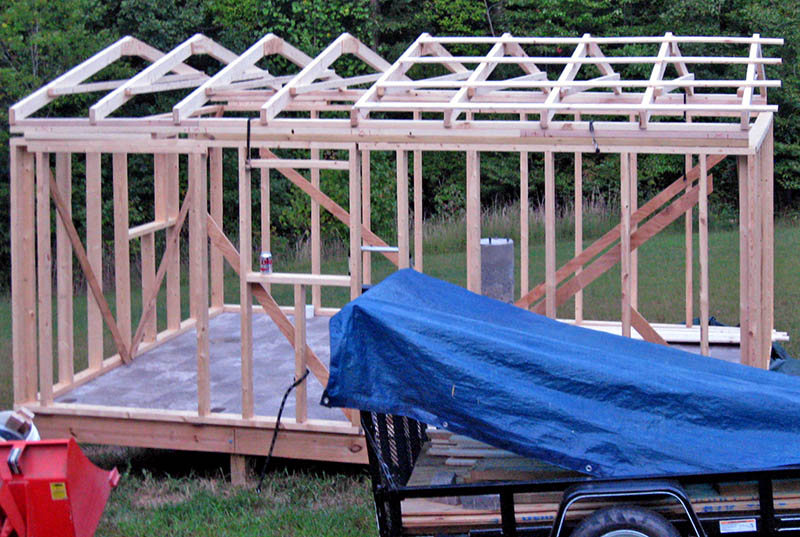
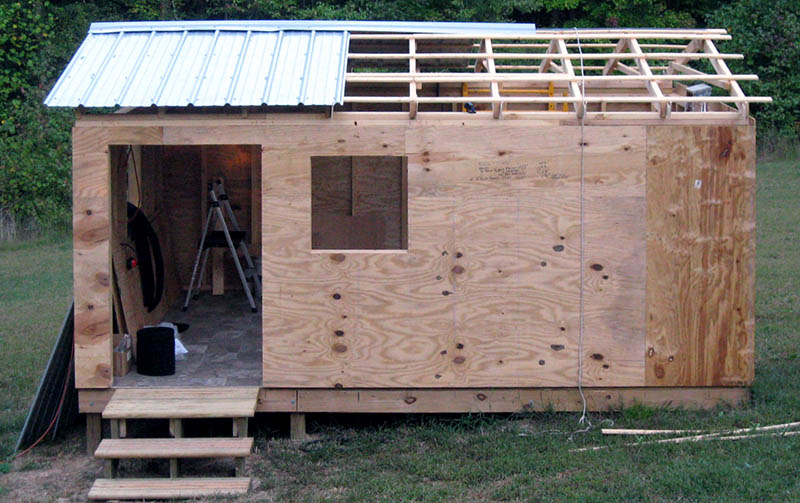
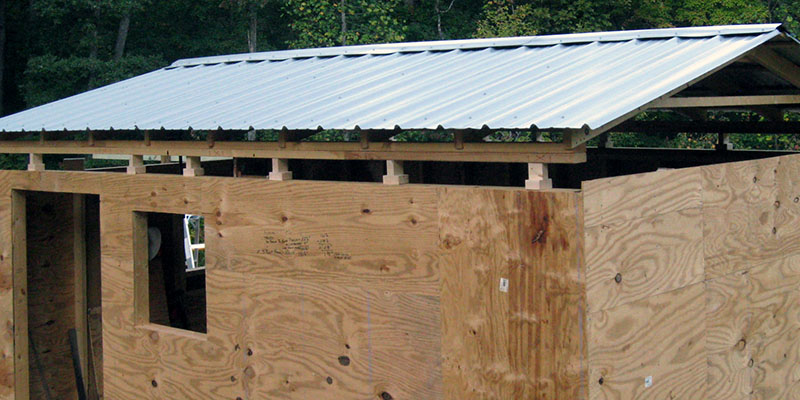
Mike installed the two end roof trusses, then began working on purlins to support the steel roofing panels. We need five purlins on each side of the roof, but since the roof is 14' long and the 1x3s are 8' long, we need to lay two 1x3s end-to-end to span the entire roof, with about 6" extending on each end.
First Mike marked the locations of all purlins on the roof trusses so he won't need to measure for each one while nailing them up. Next he cut the 10 1x3s for both sides of the south end, and nailed up four of them. The 10 on the north end will be cut and installed after all the south purlins are in place.
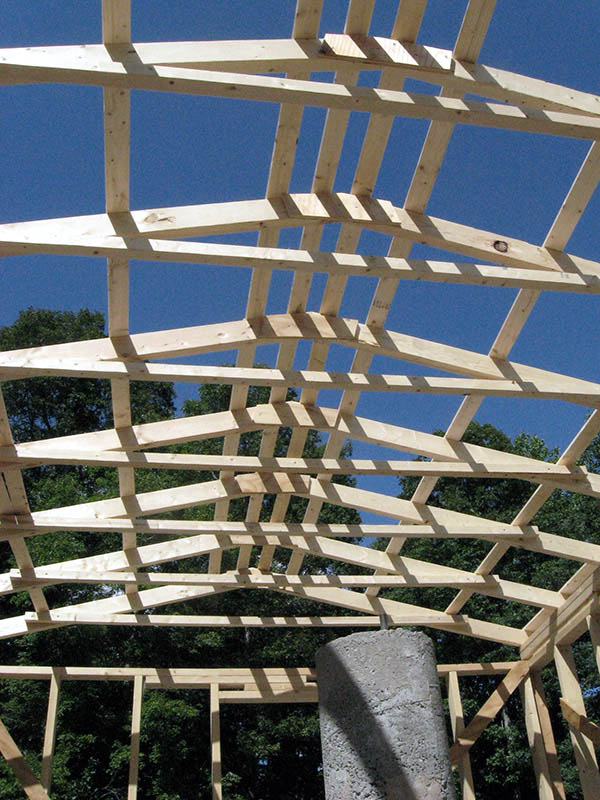
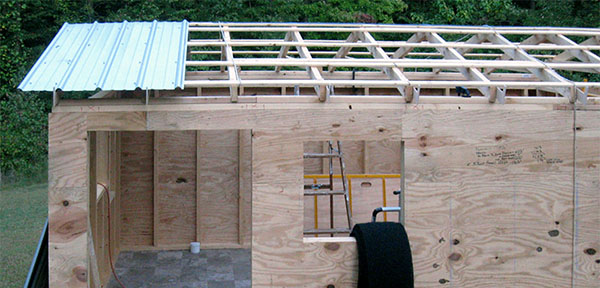
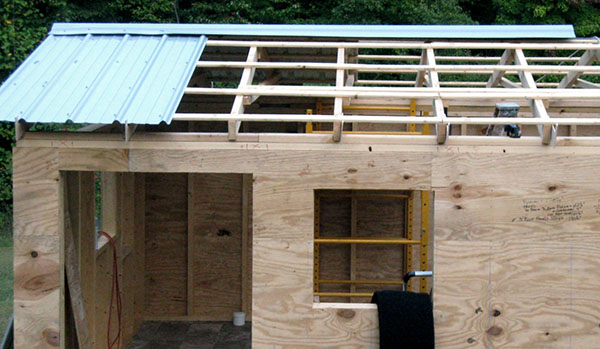
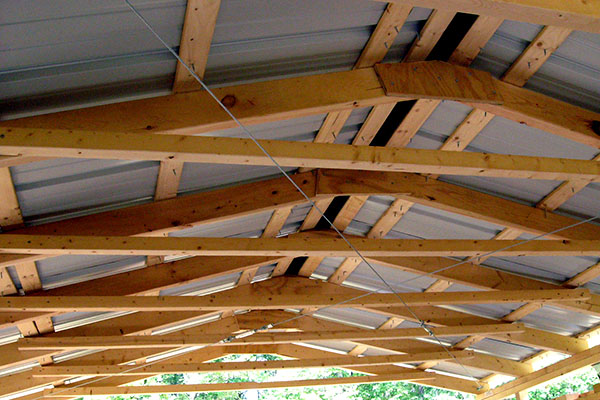
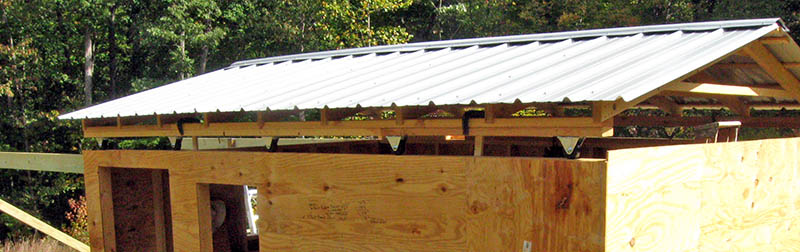
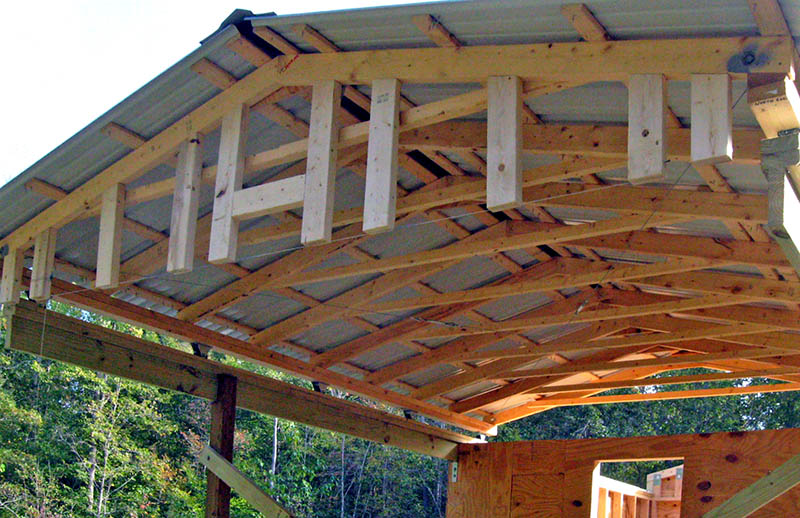
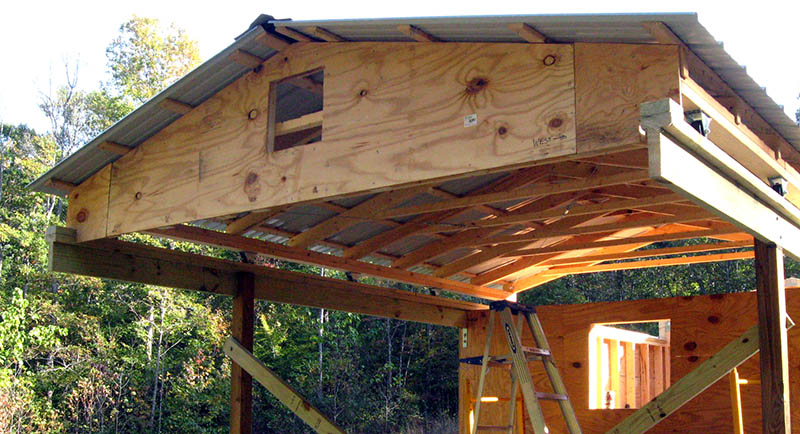
Mike installed the remaining purlins on the roof trusses. We're now ready to install the ribbed steel panels when they show up at Lowe's. This photo shows the roof framing from inside the observatory.
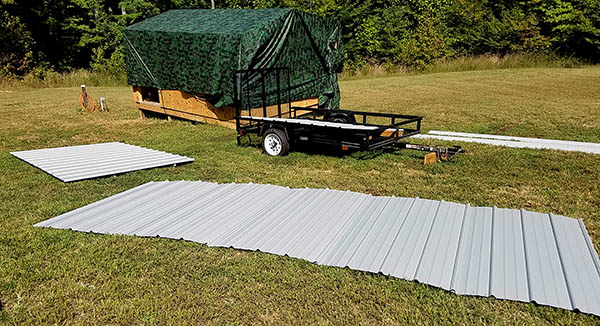
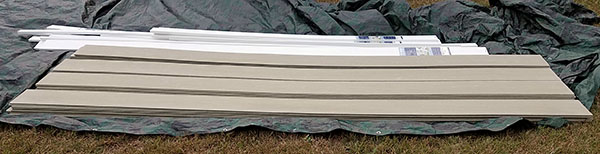
Several days ago we picked up 10 6'x3' ribbed steel roof panels and two 10' ridge caps from Lowe's. Then it rained. Today Mike unwrapped the roofing and spread it out to see how the panels fit together.
We're almost ready to install the roofing. First we need to:
Mike stapled plastic window screening over the gap between the two purlins at the roof ridge to prevent direct entry into the observatory for wasps that build nests in the ridge cap. The gray splotches are paint sprayed onto the staples to slow rusting.

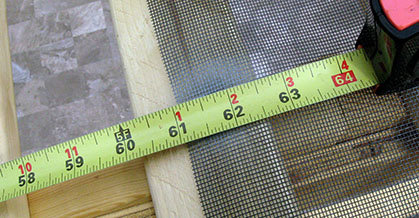
Next Mike measured the length of the top truss chords so we know how much to cut off the 6' roof panels. It's 62½" from the first purlin at the ridge to the last purlin at the eave. We'll add a 4½" overhang, so the roof panels will be 67" long.
mike also measured the length of the entire roof, then he and Louise laid five 3' panels side-by-side, with the edges properly overlaid, and measured that entire width. The panels will overhang the purlin ends by about an inch on each end of the roof.
Our final task on this hot and humid day was to check how far Mike can reach to attach roof panels while standing on a ladder or scaffold inside the observatory. It looks promising.
We decided to install the ridge cap at the same time we attach roof panels. This way, Mike won't need to reach 5½ feet to the cap from the side of the observatory while kneeling or lying on the roof.
We spent the morning identifying and buying woven plastic material to lay under the vented ridge cap. Later Mike cut a dozen L-shapes from leftover 5mm plywood, to use as stops for the steel roof panels, and ensure accurate alignment. We screwed these to roof trusses at the correct 67" from the top purlin. We'll lay a roof panel on the trusses against the stops, then drive the attachment screws, and remove the stops.
We need 16 stops for both sides of the roof, but Mike made only 12, so we'll reuse four on the opposite side after panels are installed on those trusses.
We spent a couple of hours in the hot sun cutting the 10 steel roof panels to 67" long. By the time we finished that task, we were beat, and decided to quit until evening.
At 6:00 pm we returned, and Mike began installing the first roof panel. This proved difficult, in part because of the tight squeeze between the roof trusses and purlins, but also because of the screws themselves. The "self-drilling" screws didn't drill easily through the panel, and often they flipped out of the hex driver and fell to the ground.
Here's Mike stretching to drive a screw at the far edge of the 3' panel on the roof's northeast corner.

We spent the day fixing daughter Miranda's dishwasher, but worked on the observatory for about an hour in the evening. We installed the second roof panel on the northwest corner. Mike drilled pilot holes for the screws, so driving them wasn't as big a problem as yesterday.
The black stuff hanging out the window in this photo is heavy-duty plastic mesh we will install over the top ends of the roof panels, and under the ridge cap, to keep bugs out of the ridge cap.
We spent two hours in the evening installing the first 10 feet of roof ridge cap and the third roof panel. Mike now stands on scaffolding instead of a 5-foot step ladder. The larger platform makes it easier to reach across three feet of roof panel, and to move closer to areas needing fasteners.
Here is our evening's work. The new panel is the dark area on the opposite side. We screw-down the ridge cap over each new pair of panels, one on each side of the roof.
This evening we put two more panels on the roof. Mike fully screwed down the second west panel and the ridge cap over it and the second east panel. Then we set the third east panel, and Mike drove a single line of screws across the top. He will finish that panel tomorrow.
The roof is nearly half done. This view shows the two west panels, and the shade under the three panels on the opposite side.
We put two more panels on the roof. Mike finished screwing down the third west panel and the ridge cap over it and the second east panel. Then we set the fourth east panel, and Mike drove two lines of screws across it. The roof is nearly 70% done.
Mike screwed down two more roof panels, for a total of nine installed. Then we forced the 10th panel "almost" in place – it doesn't want to slide all the way under the ridge cap. We secured it with bungee cords, and will deal with it tomorrow.
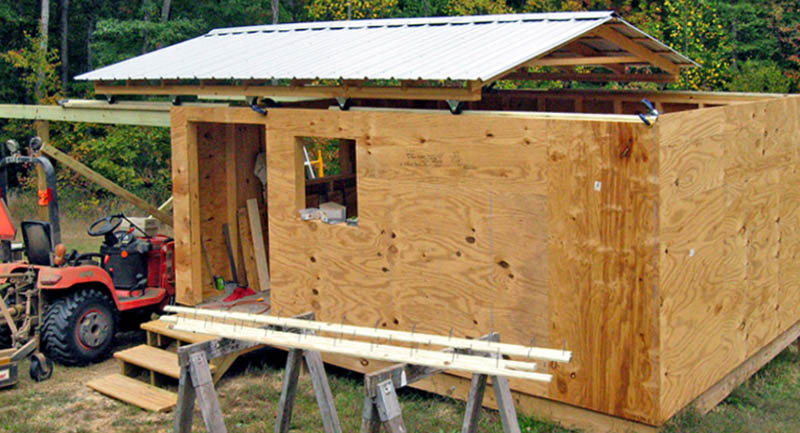
This evening Mike struggled with the 10th roof panel until it slid completely into place under the ridge cap. Then he drove two lines of screws to secure it. Tomorrow we'll move the scaffold to the south end of the observatory so Mike can reach to drive the remaining two lines of screws. Here is the observatory looking from the northwest.
We set up the scaffold outside the south wall, and Mike drove the remaining two lines of screws in the southwest roof panel. Then he climbed a ladder to drive the final screws in the southeast panel that isn't safe to reach from the scaffold.
The roof covering is complete. We still need to construct the roll-off track extensions on the north end, and lift the roof 4" to attach the wheels and frame the gables, one on top of the south wall, and the other on the north end of the roof. We'll begin those tasks in a day or two, but tomorrow we're heading to Lowe's to buy Hardieplank siding and PVC trim boards.
As planned, we bought 40 12-foot lengths of Hardieplank lap siding and a bunch of white PVC trim boards, along with two 80-pound bags of concrete mix for the roof extension track support posts. Tomorrow we'll begin building the extension tracks. In the meantime, this evening we unloaded today's materials.
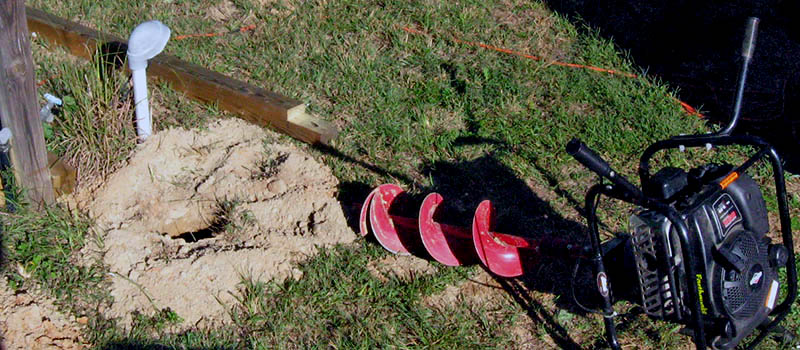
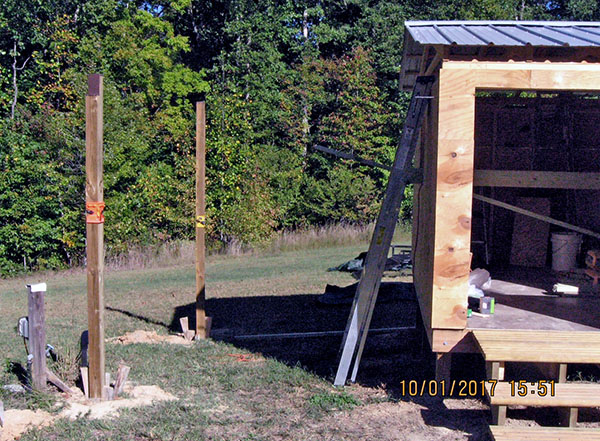
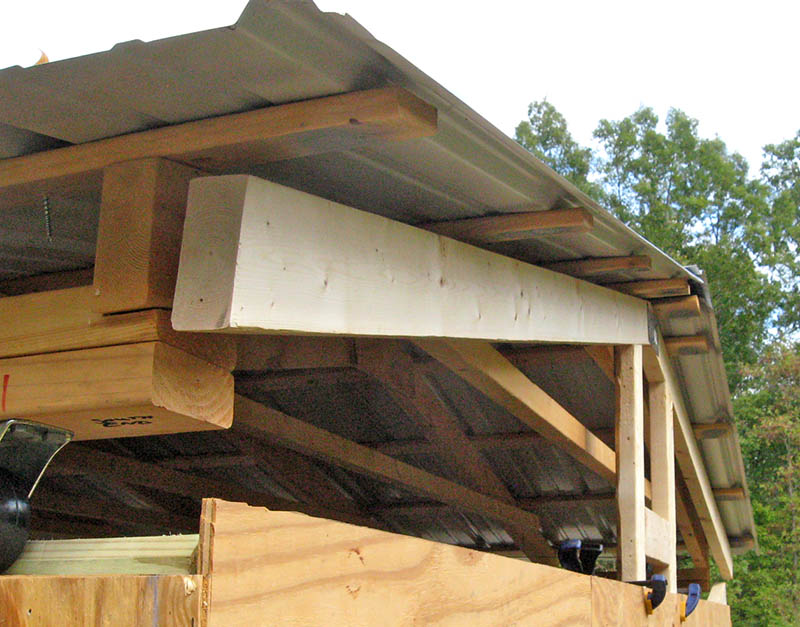
We bored two holes for the 4x4 posts to support the roof track extensions. Mike notched the tops of the 4x4s to hold the 2x6 beam that will support the 2x4 track. Here is one of the holes with its notched 4x4 nearby.
We spent about four hours measuring and setting the two posts for the roof track extensions north of the observatory. This was an iterative process because everything is relative to everything else. Not only must the posts be plumb, they must be at the same height, the same distance apart as the roof tracks, and as close as possible to the same distance from the observatory.
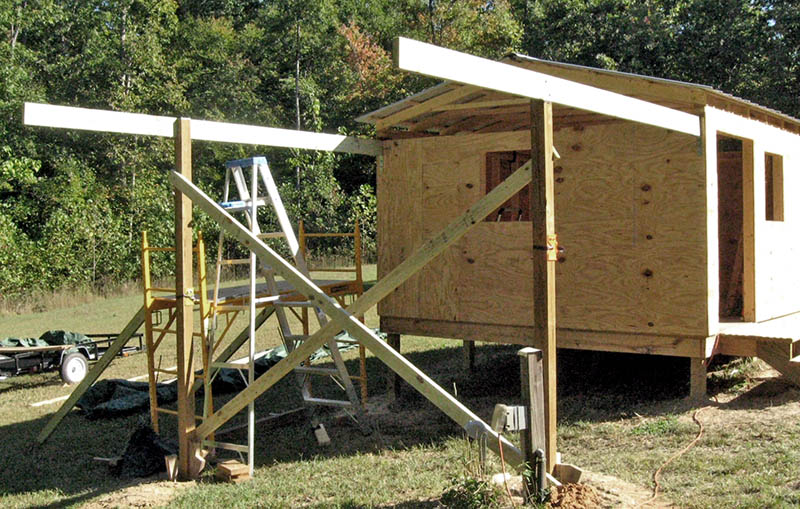
We think we got them correctly blocked in position. Tomorrow we'll mount the beams from the north wall to the posts, and adjust the posts if necessary. This photo shows today's work.
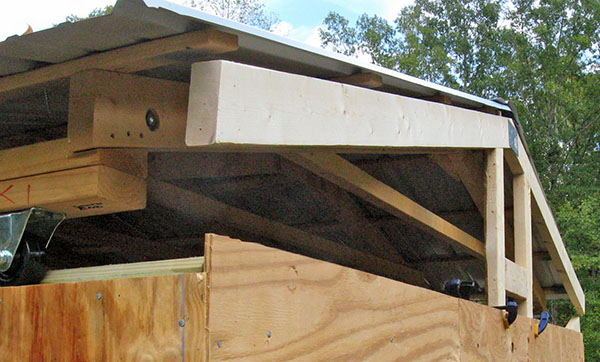
Our task today was to attach the 2x6 roof track beams to brackets on the observatory north wall and to the two 4x4 posts we plumbed yesterday. This was time-consuming, but we prevailed. Mike used the tractor to help with the west beam, and set up the scaffold to reach the higher (from the sloping ground) east beam.
Today we carefully measured to ensure both roof track beams are at the same height, level, and equally spaced over their entire length. once we were satisfied, Mike installed cross bracing on the two posts.
Next we began working on the 1/8" steel tension cables that will run diagonally corner-to-corner across the underside of the roof trusses. These will equalize the forces when the garage door opener operates to open and close the roof.
Mike adjusted the length of two steel tension cables, but now one is too long. He installed the correct-length cable, and will shorten the other one tomorrow.
In the evening we used crowbars, 2x4 blocks, and 2x4 wedges to gradually lift the roof high enough to slide 4-inch "feet" under it. We began with the two north corners, then raised the south corners. We are pleased that the doubled 2x4 stringers don't sag much under the weight. We had to lift the stringers between the corners only a fraction of an inch to fit the feet under them. Here is the roof sitting on its 4" feet.
Later this evening we ripped several 2x4s to make guard strips that will be screwed to the roof track to keep the wheels on the tracks.
Mike adjusted the length of the remaining roof tension cable, and installed them both.
Mike also bolted 10 wheels to the underside of the roof's doubled 2x4 stringers (he drilled pilot holes while the stringers were still in the workshop, so no problem driving the bolts). The roof is ready to be lowered onto the tracks, and for the extension tracks to be installed.
We removed the 4" feet and lowered the roof to set the wheels on the 2x4 track atop the walls. In the shop, Mike drilled screw holes in the guard strips, and we'll install these tomorrow along the tracks. This photo shows the roof at its final height, with the wheels resting on the tracks.
With the roof in place and the guard strips ready, Mike will install extension tracks on the two beams north of the observatory, and screw guard strips to them. Then the roof will be ready to roll.
Mike installed guard strips along 8' of both rails inside the observatory, then checked some critical measurements.
Uh-oh! The east extension track doesn't align with its beam! Louise came out to help diagonose the problem. After some initial measurements, we decided to roll the roof onto the extension tracks to see where the wheels rolled.
This test revealed that both extension tracks angle toward the east. We need to move the supporting posts west a couple of inches to align the extension tracks with their mates inside the observatory, and put the wheels fully on the tracks. We stopped for the day after discovering this issue. We'll fix it in a few days, after the predicted rain ends.
We moved the roof extension track support posts about 2" westward, and the track alignment is much better. Mike temporarily installed the remaining track and guard strips, and we carefully rolled the roof completely open. The wheels remained fully on their tracks, and reasonably close to the guard strips.
This photo shows the roof fully open. It doesn't uncover the entire 14' of the observatory because our garage door opener travels only 11 feet, 2 inches.
Here's another view of the open roof. It's way up there! That's an 8-foot step ladder on the left.
Mike spent six hours finishing the roof tracks. He permanently screwed the 2x4 extension tracks to their beams, and the guard strips to their tracks. Finally he screwed stop blocks to the north end of the extension tracks so the roof can't roll off.
Here is the roof rolled open with the north wheels against the stops. This is farther than the garage door opener can travel, so if we ever want it open this far (unlikely), we'll disconnect it from the opener and push it.
The south gable will be fixed to the wall, and the roof purlins will extend past it while the roof is closed. This means the gable must be constructed at just the right height before fixing it in place and nailing on the sheathing.
Yesterday Mike took some critical measurements and modified the 10th roof truss to serve as the gable (the roof itself has 9 trusses). Today he carried this truss to the observatory to check how it fit. It took three tries, but ultimately it fits well, with ¼" to ½" clearance under the purlins.
Here the roof is closed, and the purlins extend over the gable. Mike will install six more vertical 2x4 studs to support the sheathing and siding.
Now the roof is open a few inches, and the purlins have moved with it.
Mike nailed the remaining six 2x4 studs on the south gable while it was clamped in place to ensure all are in the correct locations to reach the wall top plate without gaps. Then he transported it in the tractor bucket to the shop. The next step is to cut plywood sheathing to size, and attach it. Then the gable can be permanently installed.
Working in the shop, Mike cut and nailed 3/8" plywood sheathing to the south gable frame. Tomorrow he will install it on the observatory south wall, then begin working on the north gable that moves with the roof.
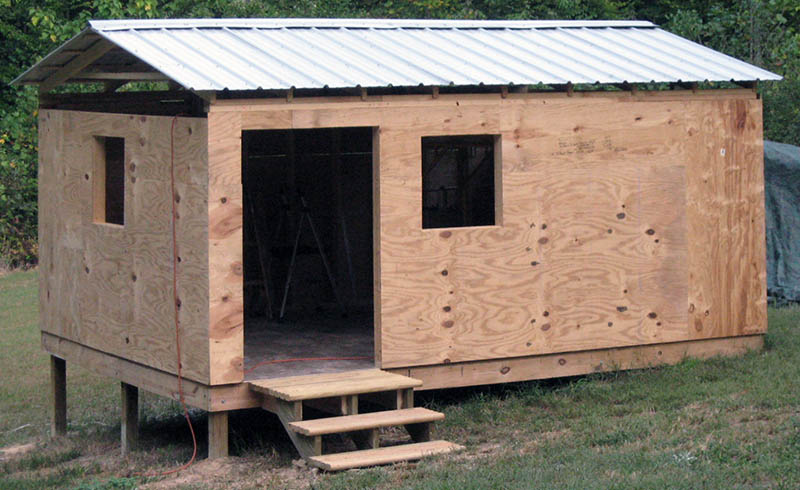
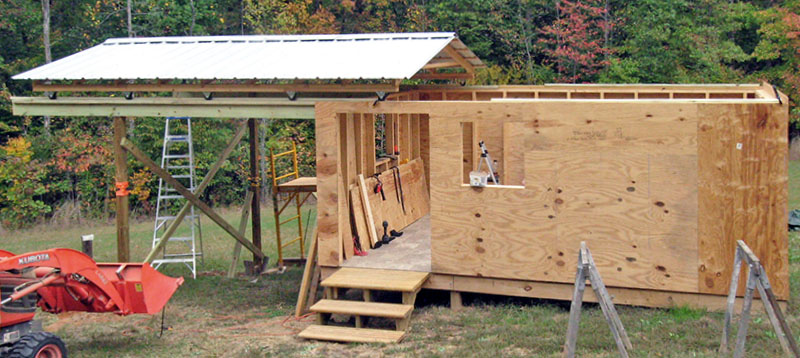
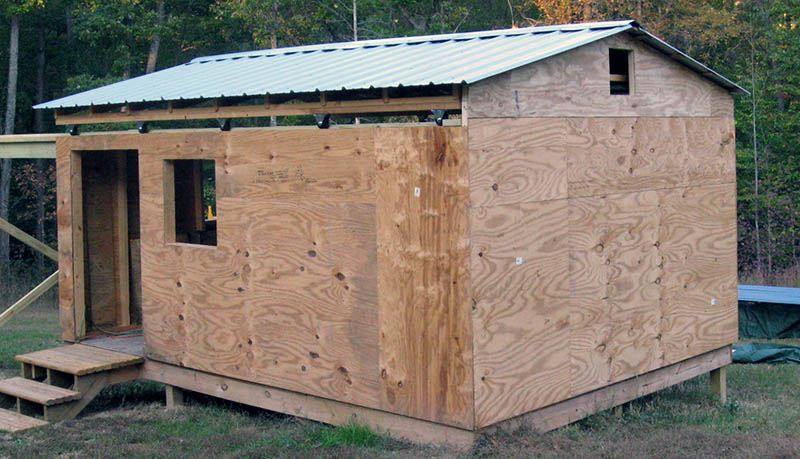
Mike installed the south gable today, and took some initial measurements for the north gable. Here's the observatory with the south gable in place, ready for siding.
Mike installed the 2x4 studs for the north gable. Tomorrow he hopes to cut and attach the plywood sheathing.
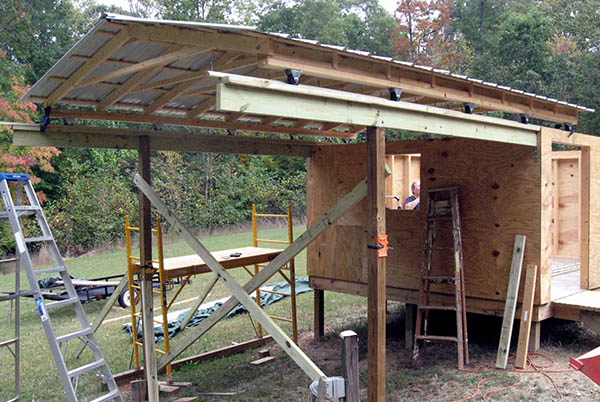
Here is the north gable framing with the roof rolled open. It travels along with the roof. It's not apparent in this photo, but the tops of the 2x4s are attached to the roof truss with metal nailing plates. Some 2x4s are also attached to the horizontal tension chord between the top chords.
Mike moved the scaffold to the north end of the observatory so he could attach the gable sheathing. He took careful measurements, then cut the plywood in the shop and carried it to the job site on the tractor.
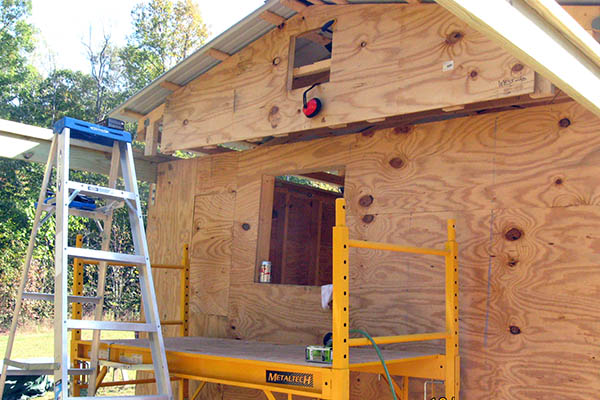
The plywood fit well. Mike held it in place with C-clamps and used the palm nailer to fasten it. Finally he cut and nailed two small pieces for the the east and west gable ends, and the sheathing was done.
The final step was to roll the roof completely open to verify that the east and west end pieces – which are notched to clear the track and wheel guards – actually do so. Yes, they do.
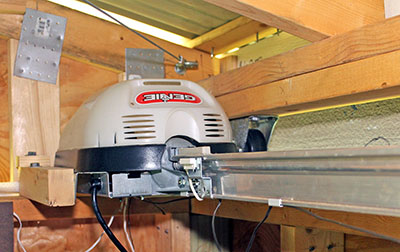
We spent many months siding and finishing the observatory, then Mike installed the garage door opener that rolls the roof. He discovered it is easier to install the it upside-down, instead of on its side as originally planned. The spacing and alignment worked out much better than expected in this orientation.
The motor is bolted to the northeast corner walls, and the end of the track is bolted in the southeast corner. The right photo shows the trolly's connction to a roof truss.
|

|
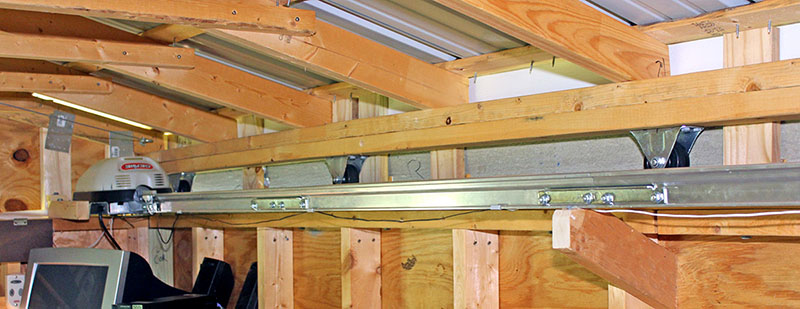
This view shows the track along the east wall, with the motor in the background. The angled 2x4 supports the center of the track to prevent sagging. It also prevents the track from lifting as the trolley passes.
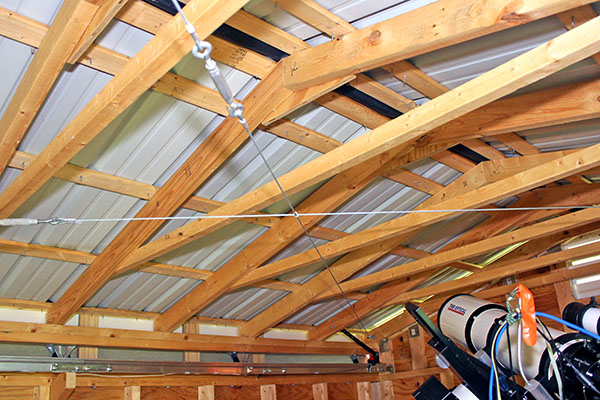
Mike attached 1/8" steel cables with turnbuckles corner-to-corner on the underside of the roof. They transfer the opener's force to the opposite side to prevent skewing the roof as it moves.
Mike wired the roof opener's pushbutton control and an obstruction sensor that isn't needed but must be connected for the opener to operate.
After final adjustments to position sensors, Mike tested the opener using a wireless remote. It works! It effortlessly rolled the roof open, then closed it at a slightly slower speed. Here are two videos:
Updated May 23, 2023