We need the frame's west side boards in place so we can measure and mark locations to attach joists inside the frame. Today we cut and installed those two boards.
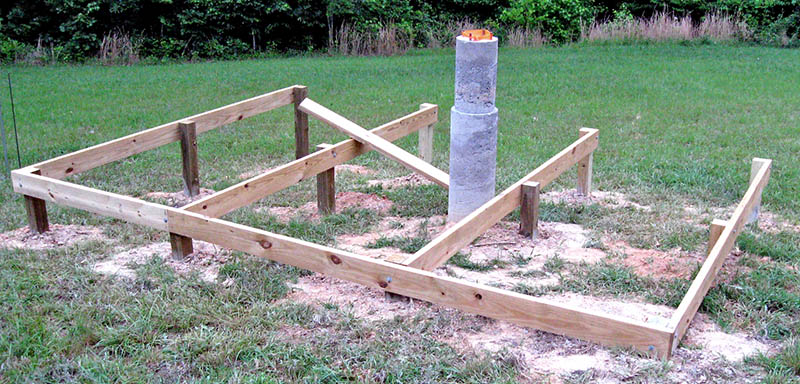
This evening we attached the rame's east side boards to complete the perimeter. One of the 2x6 cross beams is nearly ½" too high. We'll remove it and mount it lower so all framing is at the same height.
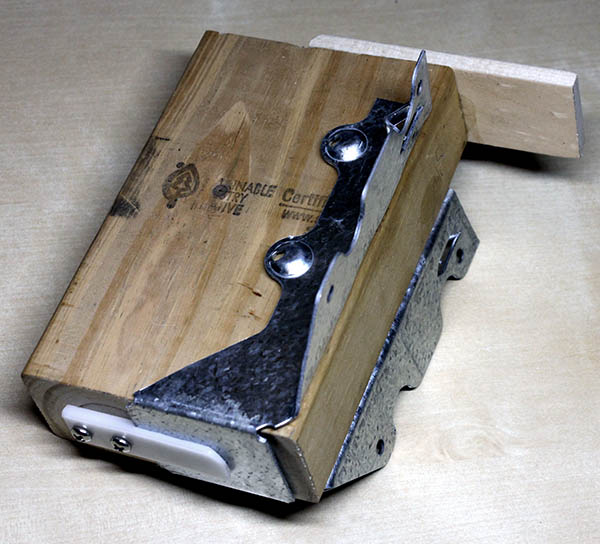
Louise marked the locations for joist hangers on the framing boards. The next step is to nail up 64 joist hangers, then cut and install the joists. to prepare for this, Mike made a simple jig to hold a joist hanger and position it correctly on a beam for nailing.
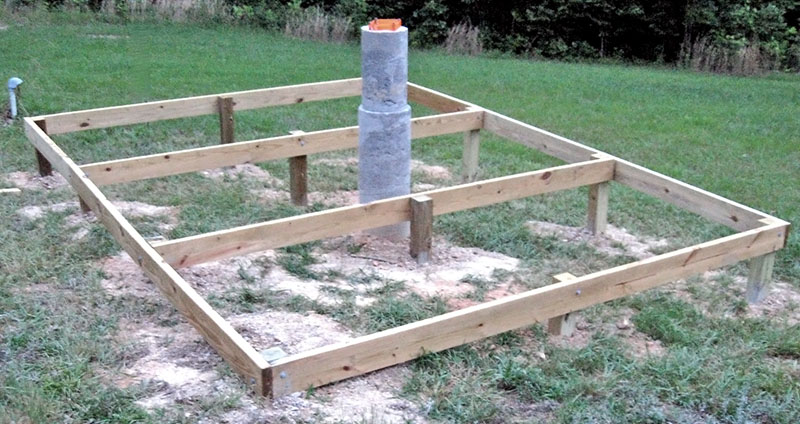
The final posts and beam we installed when it was nearly dark ended up being offset an inch toward the west, and ½" too high. Yesterday Mike lowered the beam, and today he notched the west post to remove the 1" bow in that beam. Then he cut off the tops of the posts level with the beams.
Today we installed shims on two posts on the north end beam to correct an error in those posts' locations. When we measured opposite corners, we saw exactly 17' - 4" on both diagonals, indicating a perfect rectangle. Whew!
Next we began installing joists in the deck framing. Louise had already marked the locations, so we held a joist hanger in Mike's jig, and used a palm nailer to nail it to the beam. We did this for all joists in the southern bay (photo below).
Then we cut 2x6s to the needed lengths, and set them in their hangers. Unfortunately, the 2x6s aren't the same height, so some joists were up to 1/8" higher than the beams. We brought these into the shop, and Mike will use the band saw to cut shallow notches in the bottom, so they'll sit lower in the hanger.
Tomorrow we'll use a different technique to accommodate joists of varying height.
Mike's shallow notches in the ends of the south joists did the trick. When he put them back into their hangers, all the tops were at the same level as the adjoining beam.
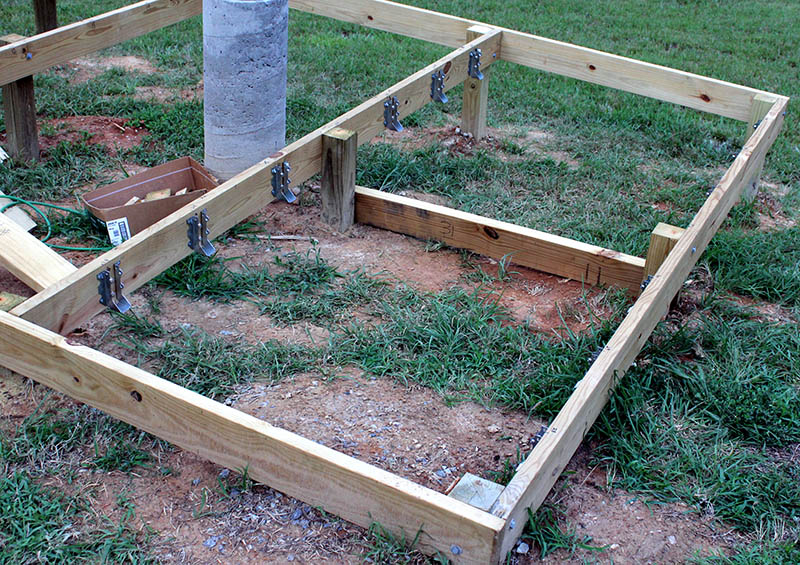
We turned our attention to joists in the north bay. Our revised technique involves first measuring and cutting each joist to its final length. Then, as shown in the photo below, we clamp a joist hanger on the bottom, and a piece of wood on the top of each end of a joist. We set the joist in place between the beams, with the wood supporting the joist, and holding it at the correct height. Next we nail the joist hangers to the beams.
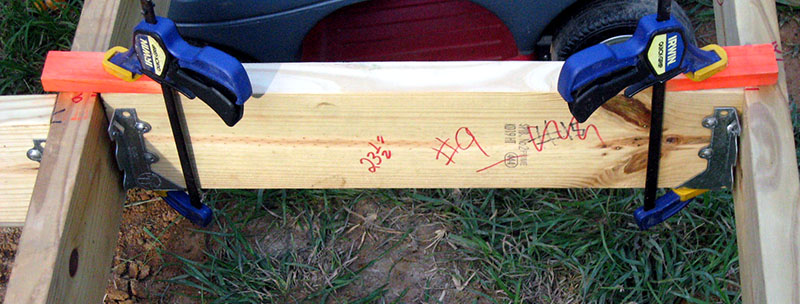
The final step is to drive two 3½" nails at an angle through the joist and into the beam. We did this on all joists in the north and south bays.
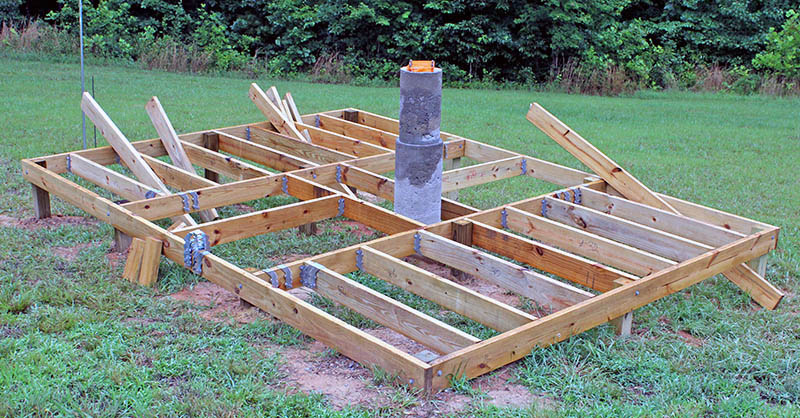
Here is this evening's work. Tomorrow we expect to install three short joists in the gap in middle of the north bay, and install most of the joists in the center bay.

We changed the plan slightly to use one long joist in the north bay in place of three short ones. We also adjusted the joist spacing in the center bay to eliminate two short 2x4 blocks by the pier.
Working in the evening kept us out of direct sun and heat, but the humidity was high. We installed the long north bay joist, than cut and installed the longest joists in the center bay. Only 11 joists remain to be cut and installed. Mike measured the needed lengths for eight of them, and Louise wrote those measurements on the designated boards for later reference.
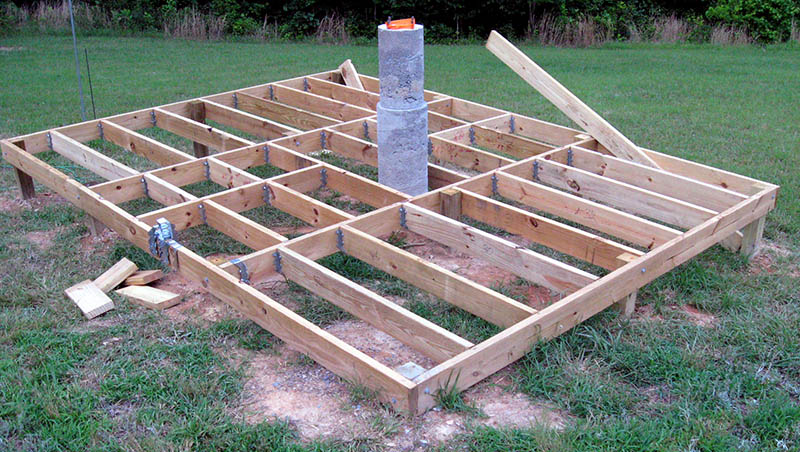
Mike snapped this photo of this evening's work the next morning after a light overnight rain.
This morning, Mike used the tractor to bring the boards for the next eight joists into the shop, where he used the chop saw to cut them to the needed lengths. This was much easier than cutting them on-site with a handheld circular saw.
In the evening, Mike took the joists to the job site and installed them in the middle bay. He then measured and marked locations for three short joists in the pier bay, and took those boards to the shop, for cutting tomorrow.
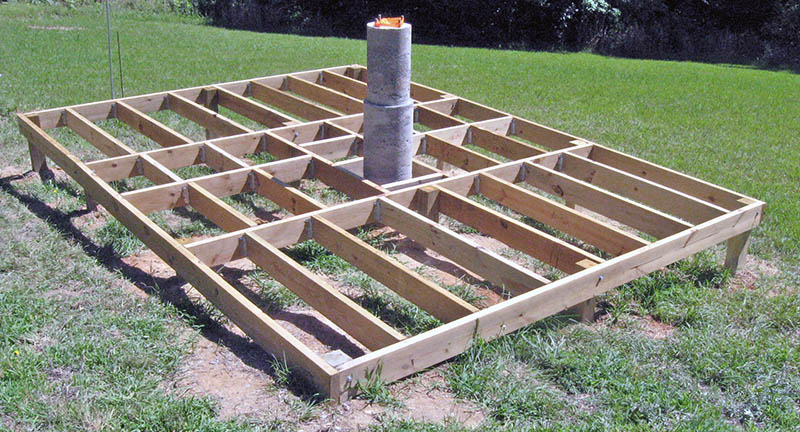
Here is today's work. The three joists in the pier bay will complete the deck framing.
We installed the final three joists in the pier bay, and the deck frame is complete. Next up: lay some plywood and build the walls.
Updated May 23, 2023